 Editing Picture & Sound I
Objective: To familiarize students with the workflow between video and audio editing software applications.
Assessment: Your individual grade will be averaged with other project scores.
Submit: a Premiere production as specified to your assigned folder on the anim-stor1 server.
Use the following nomenclature and signal path to create a new Adobe Premiere production: smb://anim-stor1.dc1.pennwest.edu >> cinema >> SP23 | 453 >> your studio >> READING >> your name >> PROJECT >> PREMIERE >> Reading Out Loud
Add a project named “EDIT” to that production: smb://anim-stor1.dc1.pennwest.edu >> cinema >> SP23 | 453 >> your studio >> READING >> your name >> PROJECT >> PREMIERE >> Reading Out Loud >> EDIT
Create project bins for *Sequences, Audio (with FX and Music sub-bins), Video, and Graphics. Import files from the server.
Create a sequence using the Arri 1080p 23.96 preset. Name your sequence using the proper PennWest Philm nomenclature.
Begin your timeline with a standard leader. Remember to mark ‘in’ and ‘out’ points in the source monitor, then use the ‘insert’ command to quickly, efficiently build a timeline.
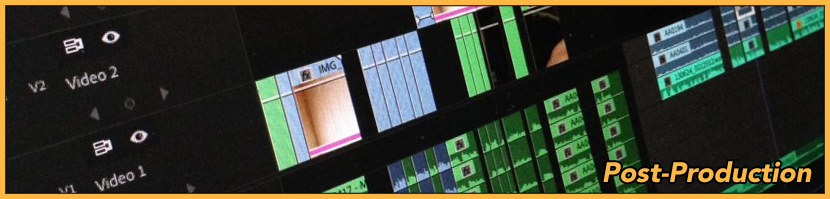
Use ‘in’ and ‘out’ points in the source monitor to divide the footage into helpfully labeled subclips. By now, your project window probably looks something like this.
Edit the footage as indicated.
- Remember: the footage was shot in 4K resolution; you’re editing in a 1080p sequence. The video may need to be set to frame size.
- Remember: you may (and probably should) unlink the video and audio to achieve L- and J-cuts.
- To give yourself practice using frame-accurate trim tools (like “ripple,” “rolling,” and “slip”) on dialogue and video, cut from the master long shot to a close-up of the man then back out to the master while he’s speaking. Include a cut-in of the book where it pleases you.
- Add a superimposed title over the first shot and five seconds of credits (from the project’s “documentation” folder) after the last.
- Duplicate the sequence before adding sound effects.
- Here’s my version at this stage of the project.
Switch to the Audio workspace. Add and relabel audio tracks as follows:
A1: Justin – identify the dialogue track by the actor’s name.
A2: Drone 1 – choose a selection from the Soundscalpel Drones and Textures Sound Effects Pack to fill as much of this track as possible without stretching or editing.
A3: Drone 2 – add a clip from a second track from the same collection, but only during the most intense part of the scene.
A4: Growl 1 – place one selection from the Soundscalpel Monsters Sound Effects Pack here.
A5: Growl 2 – place a second selection from the Soundscalpel Monsters Sound Effects Pack here.
A6: Baby – place a distressed cry from the Soundscalpel Baby Sound Effects Pack in this track.
S1: DX – Use the track output assignment tool in the audio track mixer window to route Justin’s dialogue to this submix.
S2: FX – Use the track output assignment tool in the audio track mixer window to route all of the FX tracks to this submix.
At this point, please resist the temptation to improve the dialogue with the Essential Audio panel or adjust the sound effects in Premiere. Merely placing them is sufficient. Here’s my version at this stage of the project. For mixing, we’ll export the sequence to Audition in Part II of the project.