Hospital Color
Prepare a Sequence. Start this and every editing session by duplicating your most recent timeline sequence. Rename with the proper sequence nomenclature as shown:

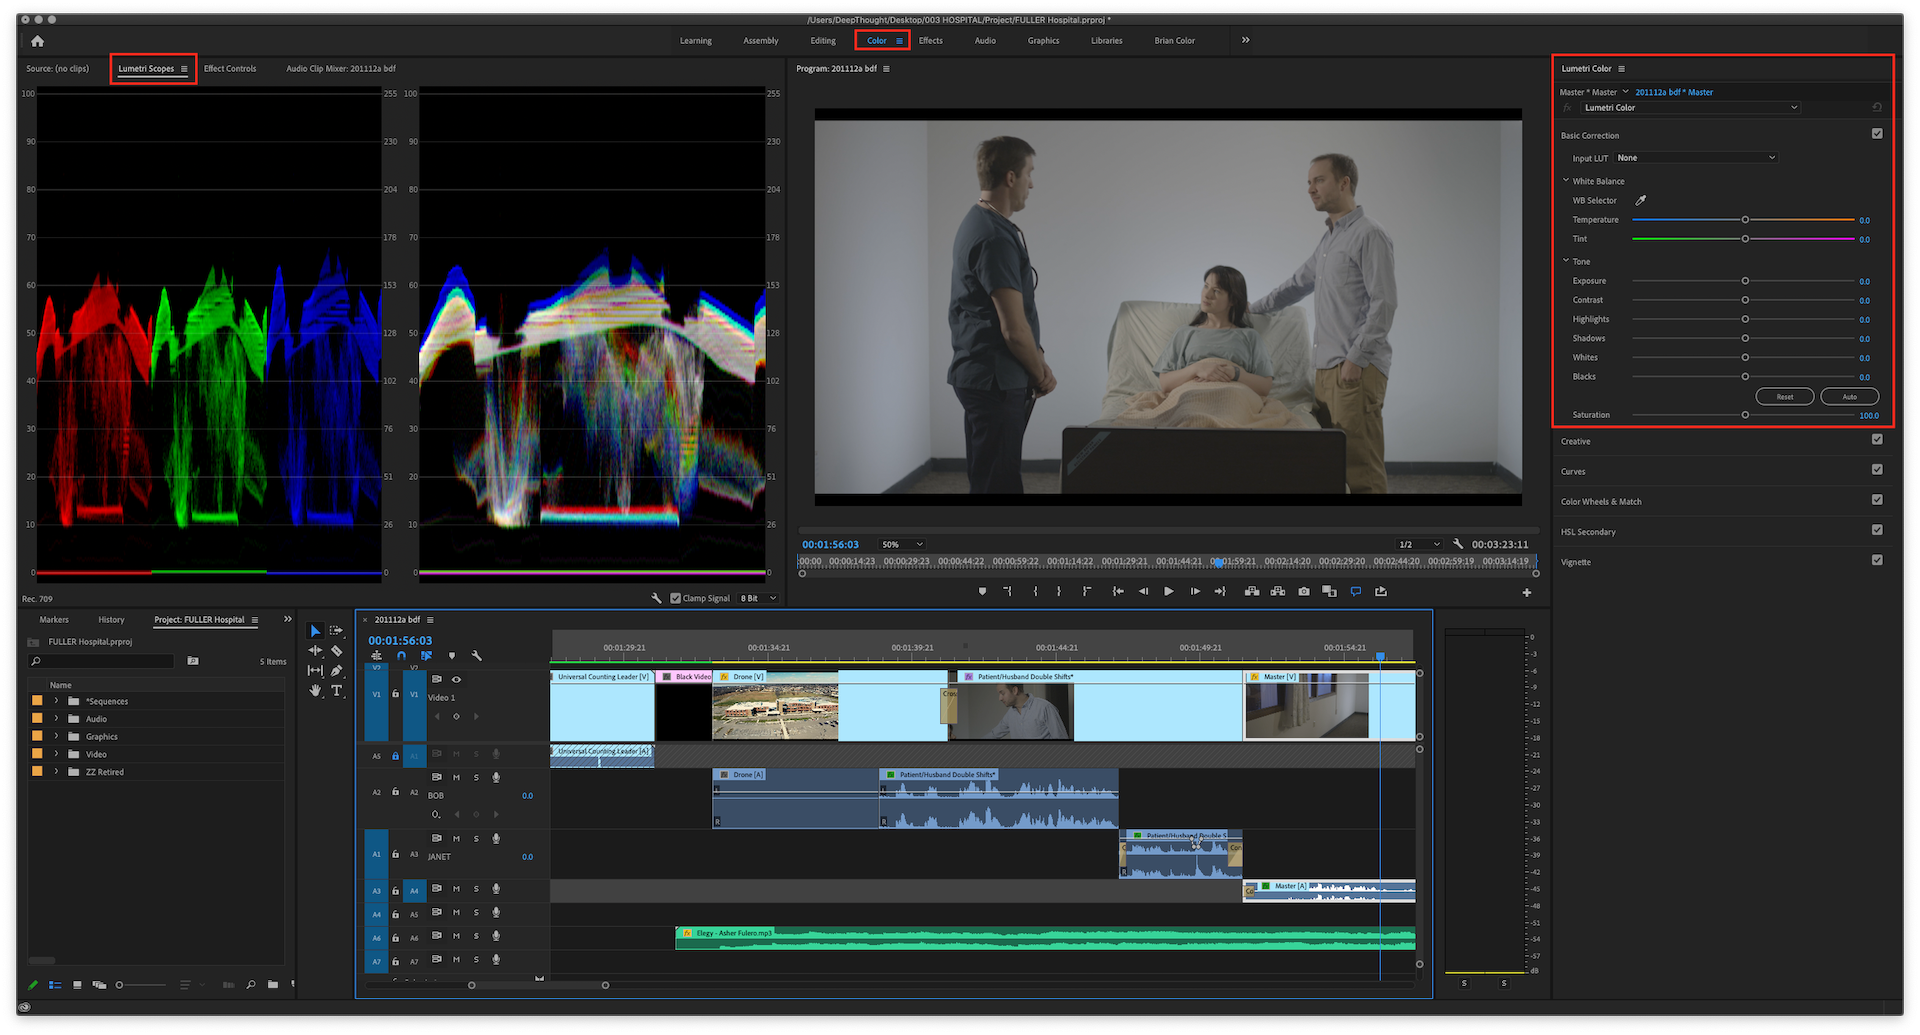
Switch to the Color Workspace, thus arranging Adobe tools and windows for the ease of color correction and grading. Move your timeline playhead to the scene’s most emotionally important shot.
Monitor the chrominance (color) and luminance (brightness) values of your footage using the Waveform and RGB Parade monitors in the Lumetri Scopes panel.
Open the Basic Correction tab in the Lumetri Color panel. Press the “Auto” button.
Repeat for the first instance of each shot in the scene. Copy and Paste Attributes to apply color effects to successive instances of the same shot.
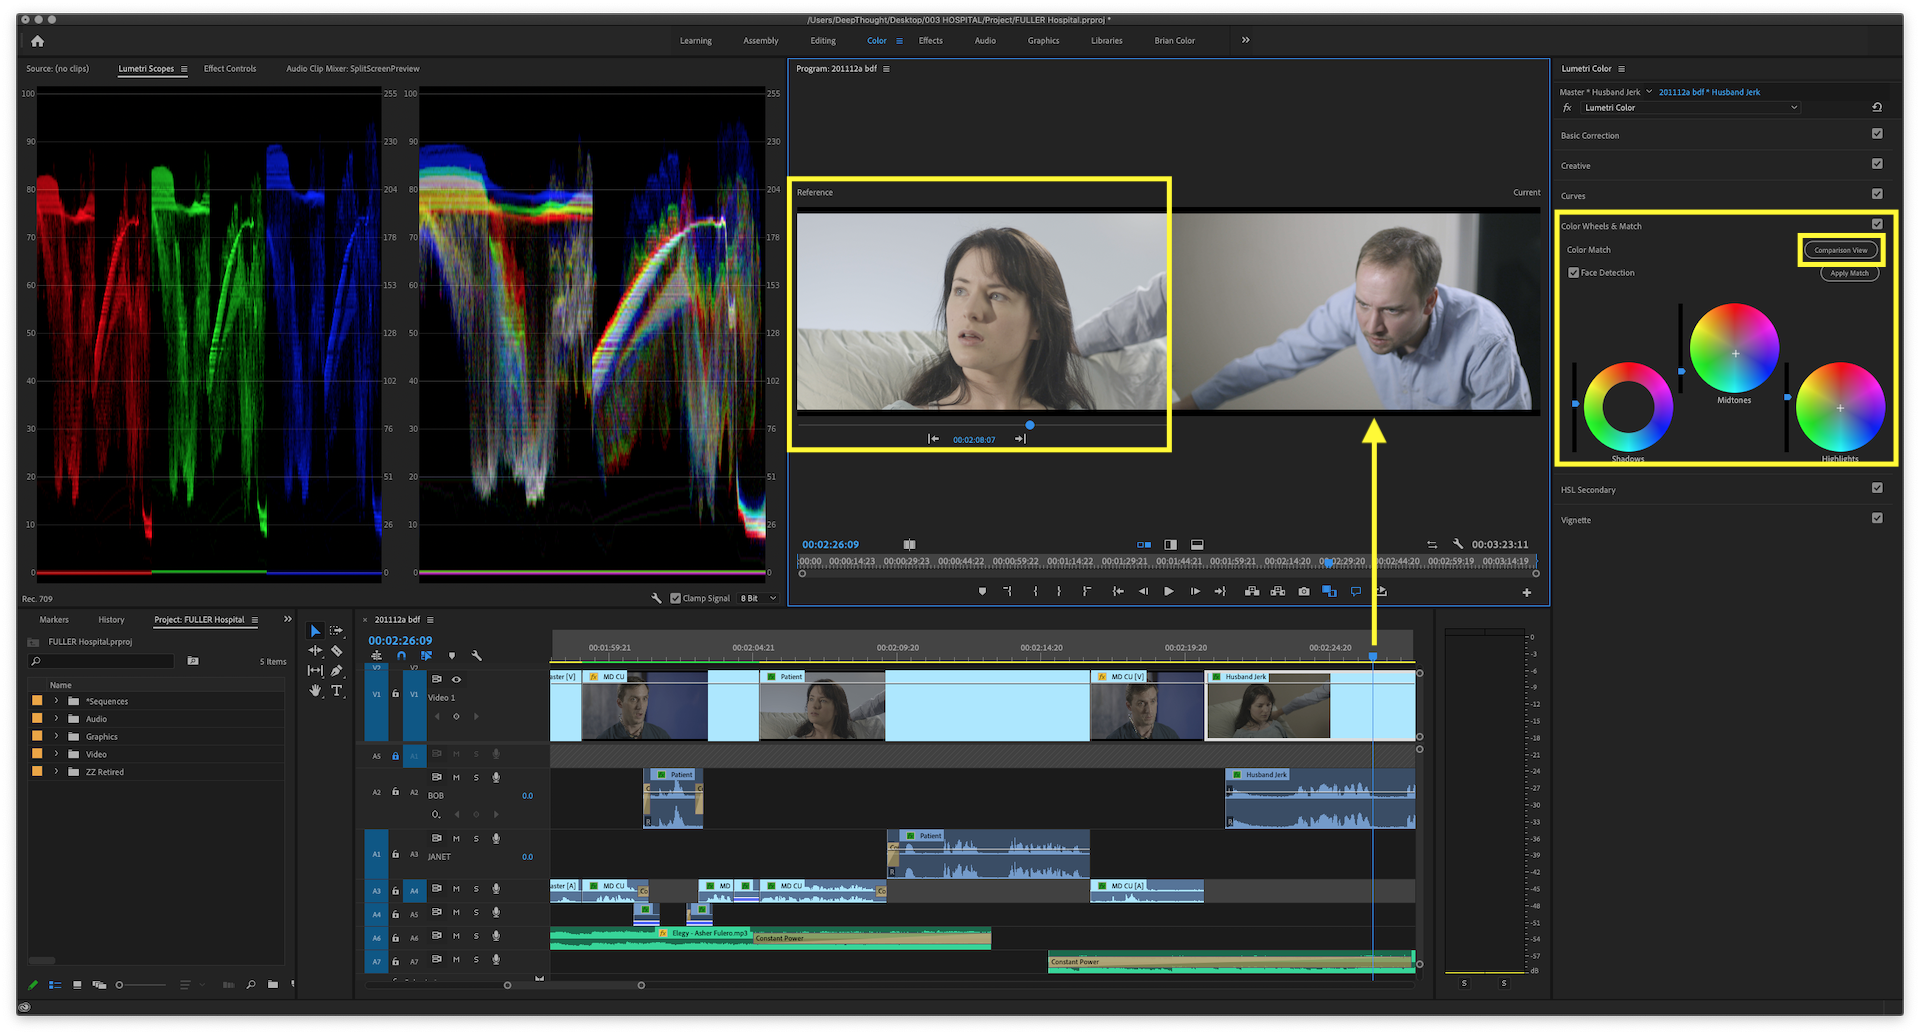
Open the Color Wheels & Match tab in the Lumetri Color panel. Press the “Comparison View” button. Move the cursor under the reference monitor (on the left hand side of the Program Monitor window) to the scene’s most emotionally important shot. Move the Timeline playhead to change scenes in the current monitor (on the right hand side of the Program Monitor window). Compare colors (particularly of flesh tones) in all the shots of the same scene, making sure they conform to colors in the reference shot.
When you are finished color work in the scene, press the “Comparison View” button again to return the Program Monitor to its default configuration.


 Basic Correction
 Color Wheels & Match