DUPLICATE and RENAME a new version of the sequence as shown:

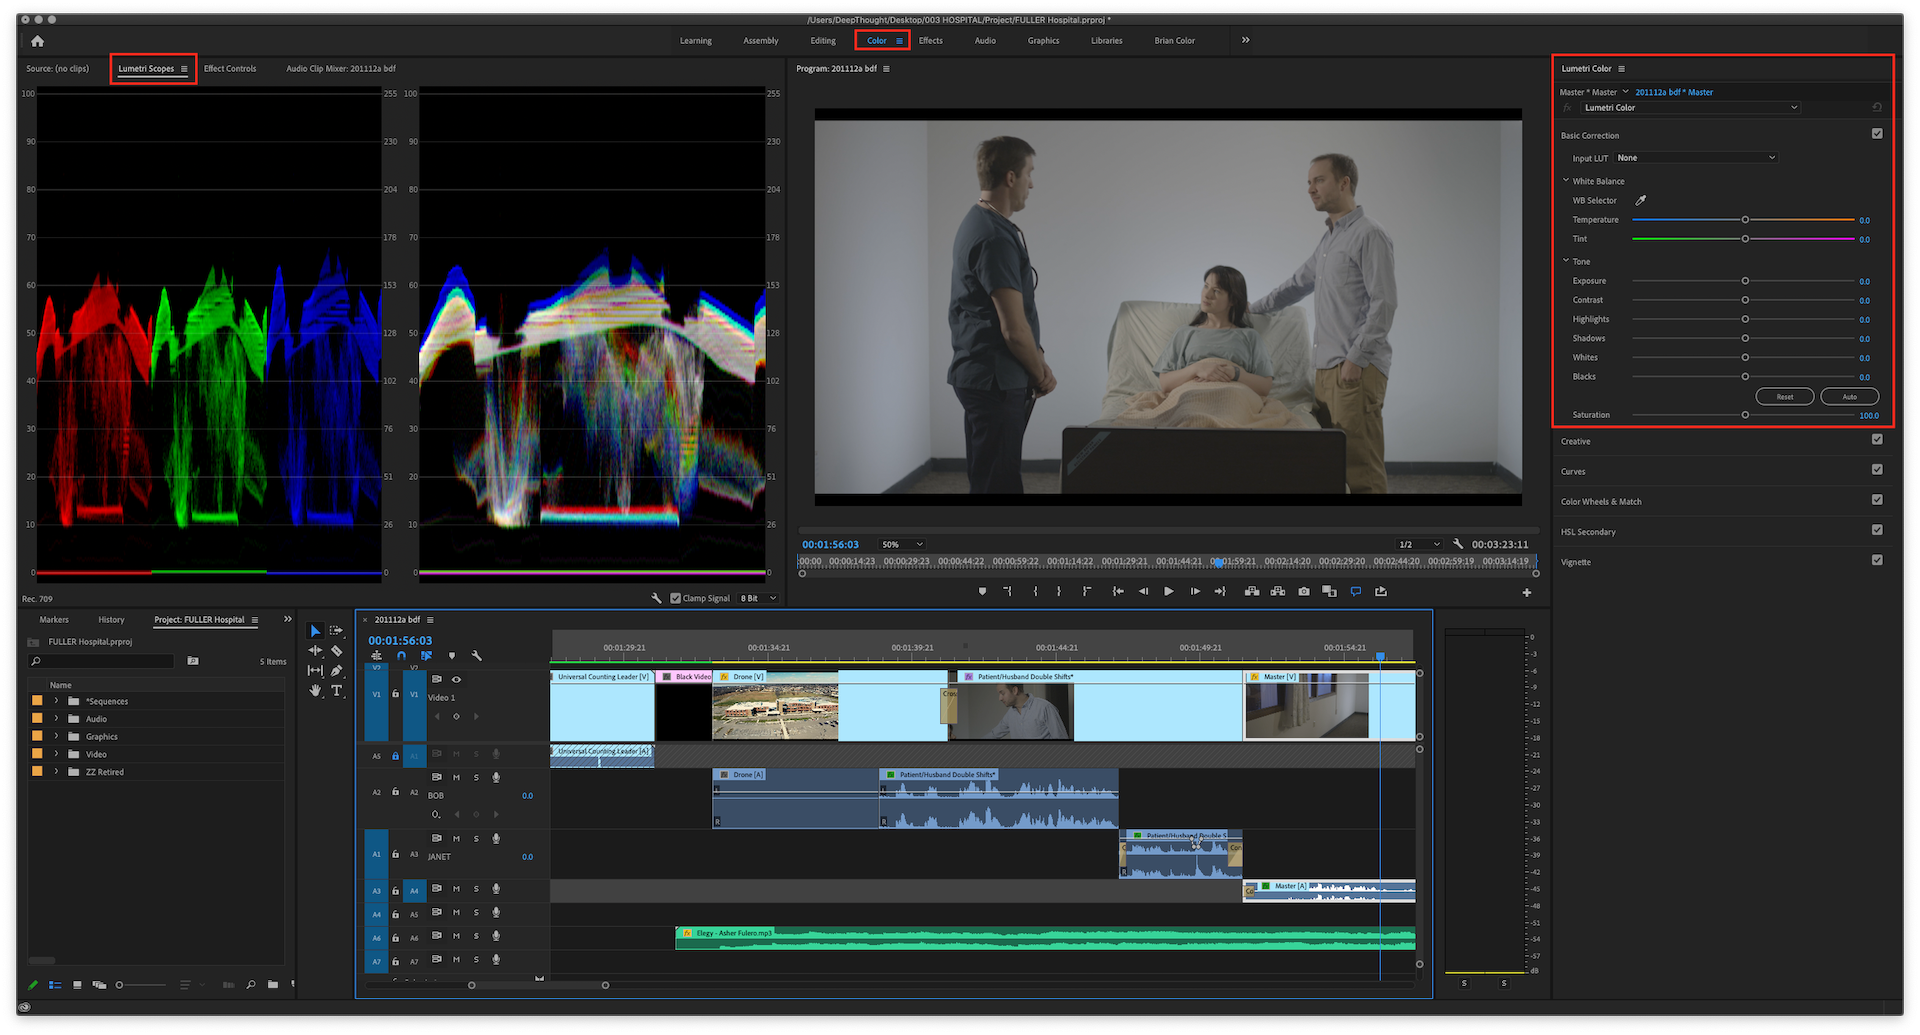
Choose Adobe Premiere Pro’s COLOR WORKSPACE.
THE MOMENT. Move the timeline playhead to the scene’s most emotionally important shot.
Use an OPACITY MASK to isolate a patch of skin for comparison to the VECTORSCOPE FLESH LINE.

Check brightness, contrast, white, and black levels using the WAVEFORM monitor. As a starting places for “normal” shots, aim for a spread between 10-90 IREs.
COPY & PASTE ATTRIBUTES to other instances of the same shot.

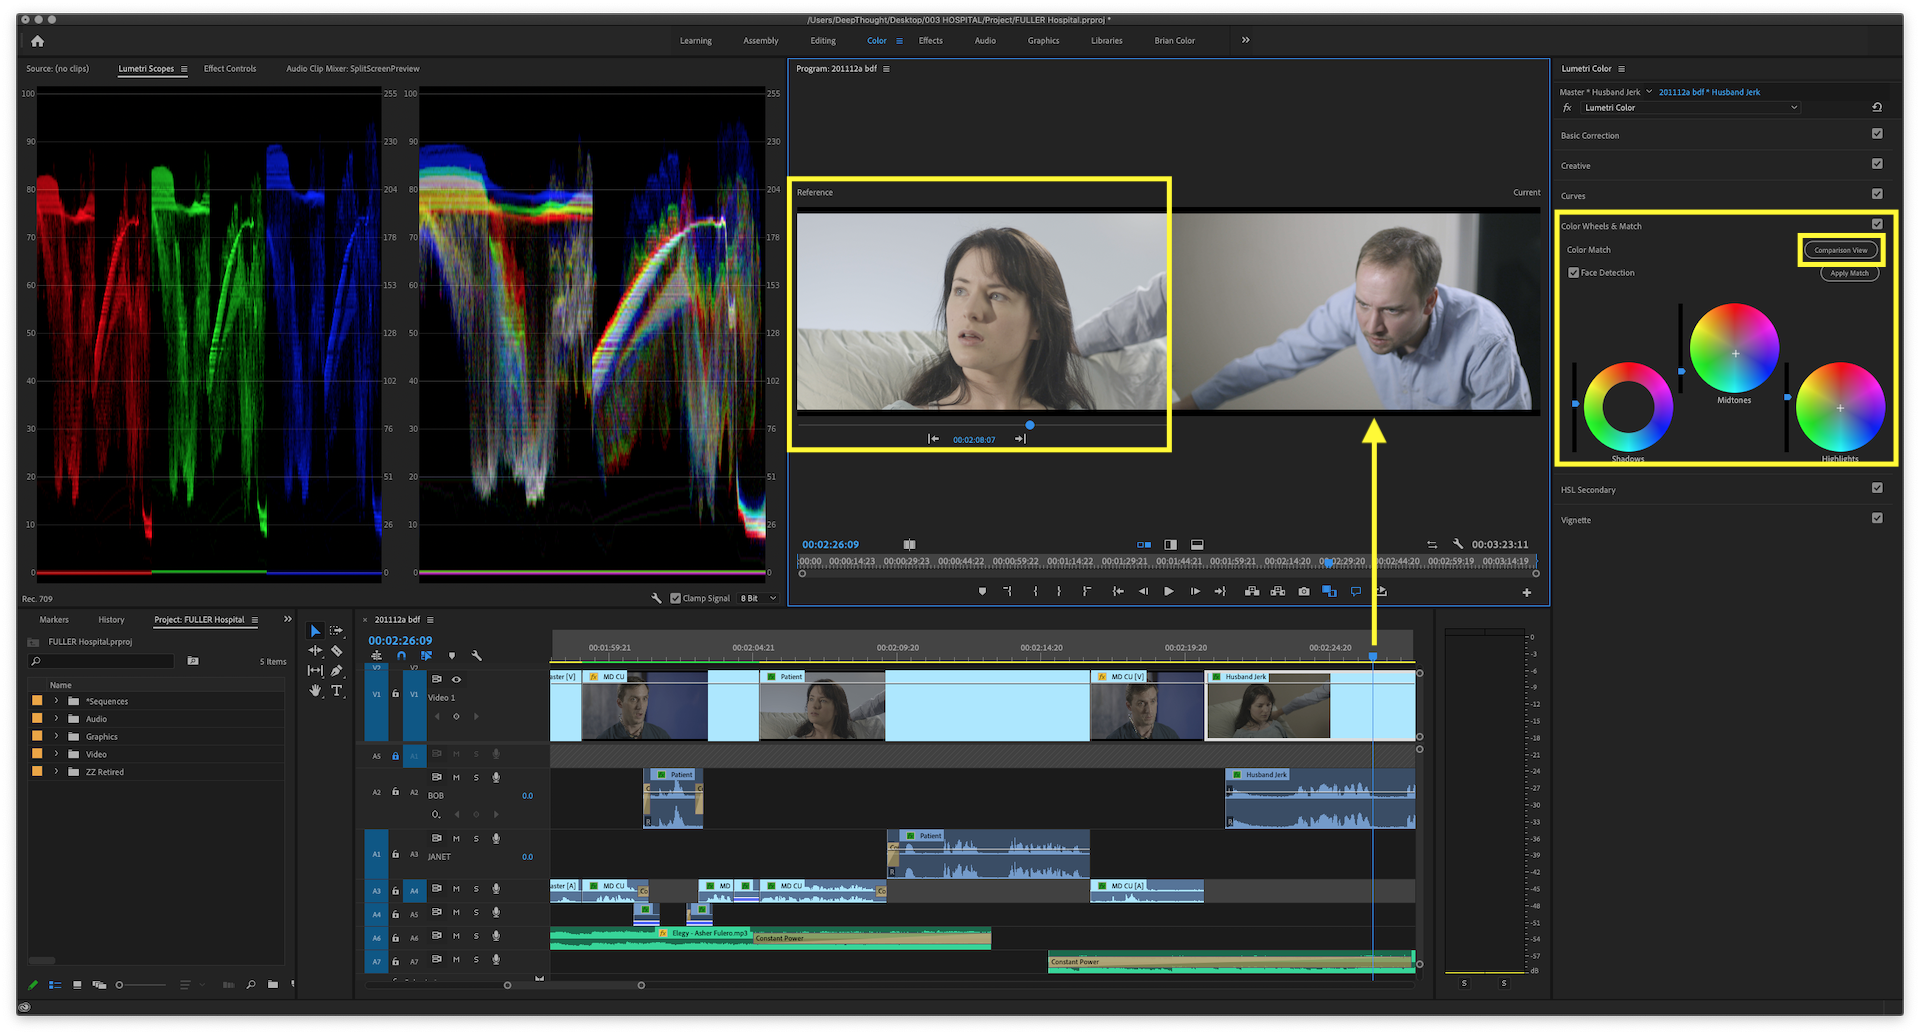
COLOR WHEELS & MATCH. Open COMPARISON VIEW. Use “The Moment” as a reference frame. Conform colors in the scene’s remaining shots to The Moment.
Advanced users: Apply a CREATIVE LOOK to an ADJUSTMENT LAYER.
